Unity 主菜单教程
用户界面 (UI) 结合了图形、文本和按钮,在提供愉快的游戏体验方面发挥着至关重要的作用。
主菜单是用户界面中最突出的部分之一,因为它通常是玩家加载游戏时首先看到的东西。
在本教程中,我将展示如何使用 UI Canvas 在 Unity 中创建主菜单。
第 1 步:设计主菜单
- 创建一个新的画布(游戏对象 -> UI -> 画布)

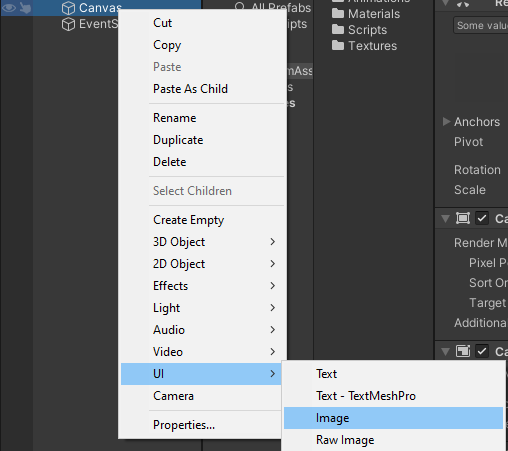
- 右键单击 Canvas -> UI -> Image 创建一个新图像(这将是菜单背景)
- 将纹理分配给新创建的图像。您可以使用下图(右键单击 -> 另存为...),并确保在导入设置中将其纹理类型设置为 'Sprite (2D and UI)':

- 创建 一个新脚本,将其命名为 SC_BackgroundScaler,然后将以下代码粘贴到其中:
SC_BackgroundScaler.cs
using UnityEngine;
using UnityEngine.UI;

[ExecuteInEditMode]
public class SC_BackgroundScaler : MonoBehaviour
{
    Image backgroundImage;
    RectTransform rt;
    float ratio;

    // Start is called before the first frame update
    void Start()
    {
        backgroundImage = GetComponent<Image>();
        rt = backgroundImage.rectTransform;
        ratio = backgroundImage.sprite.bounds.size.x / backgroundImage.sprite.bounds.size.y;
    }

    // Update is called once per frame
    void Update()
    {
        if (!rt)
            return;

        //Scale image proportionally to fit the screen dimensions, while preserving aspect ratio
        if(Screen.height * ratio >= Screen.width)
        {
            rt.sizeDelta = new Vector2(Screen.height * ratio, Screen.height);
        }
        else
        {
            rt.sizeDelta = new Vector2(Screen.width, Screen.width / ratio);
        }
    }
}- 将 SC_BackgroundScaler 脚本附加到新创建的图像。(附加后,脚本将自动缩放背景图像以适合屏幕):

创建菜单按钮:
- 右键单击 Canvas -> Create Empty 然后将其重命名为 "MainMenu"。该对象将包含主菜单的 UI 元素。
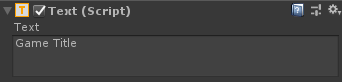
- 通过右键单击 "MainMenu" 对象 -> UI -> 文本来创建新文本。这将是标题文本。
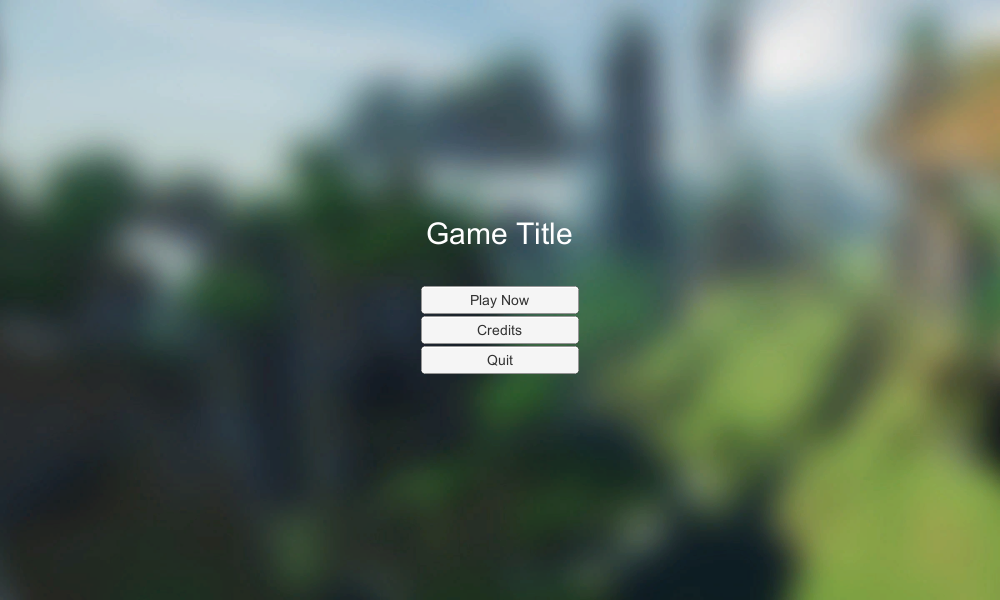
- 将文本更改为您的游戏名称(在我的例子中为 "Game Title"):
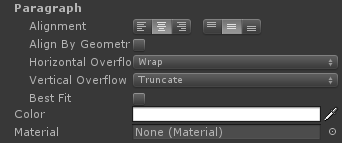
- 将段落对齐方式更改为中间居中并将颜色更改为白色:
- 最后,将字体大小更改为更大的值(例如 30),并将字体样式更改为粗体。
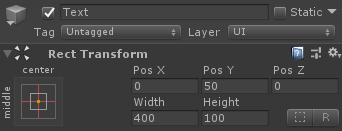
但是,您会注意到文本消失了,这是因为矩形变换尺寸太小。将它们更改为更大的值(例如宽度:400 高度:100),还可以通过将 Pos Y 更改为 50 将其稍微向上移动:
- 创建 3 个按钮(右键单击 "MainMenu" 对象 -> UI -> 按钮 3 次)并将每个按钮向下移动 30 像素。
- 将每个按钮的 Text 分别更改为 "Play Now"、"Credits" 和 "Quit":
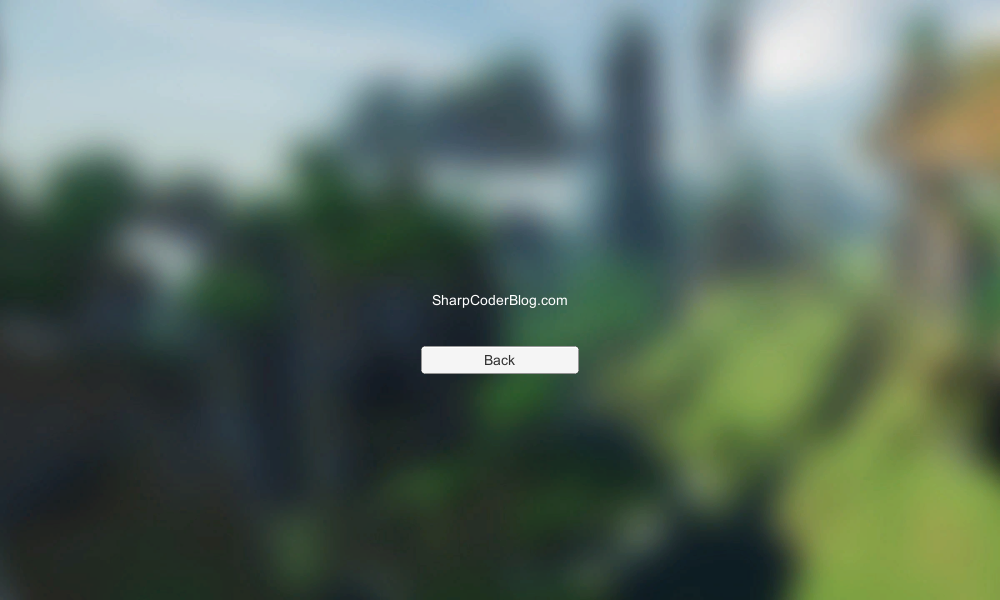
- 复制 "MainMenu" 对象并将其重命名为 "CreditsMenu",删除其中除 "Quit" 按钮之外的所有按钮,并将其文本更改为 "Back"。
- 将 "CreditsMenu" 中标题文本的字体大小更改为较小的值(例如 14),将其 Pos Y 更改为 0,然后键入制作人员名单文本。
第 2 步:对菜单按钮进行编程
现在我们需要通过创建脚本来使按钮发挥作用。
- 创建一个新脚本,将其命名为 SC_MainMenu,然后将以下代码粘贴到其中:
SC_MainMenu.cs
using System.Collections;
using System.Collections.Generic;
using UnityEngine;

public class SC_MainMenu : MonoBehaviour
{
    public GameObject MainMenu;
    public GameObject CreditsMenu;

    // Start is called before the first frame update
    void Start()
    {
        MainMenuButton();
    }

    public void PlayNowButton()
    {
        // Play Now Button has been pressed, here you can initialize your game (For example Load a Scene called GameLevel etc.)
        UnityEngine.SceneManagement.SceneManager.LoadScene("GameLevel");
    }

    public void CreditsButton()
    {
        // Show Credits Menu
        MainMenu.SetActive(false);
        CreditsMenu.SetActive(true);
    }

    public void MainMenuButton()
    {
        // Show Main Menu
        MainMenu.SetActive(true);
        CreditsMenu.SetActive(false);
    }

    public void QuitButton()
    {
        // Quit Game
        Application.Quit();
    }
}- 将 SC_MainMenu 附加到 Canvas 对象
- 将 "MainMenu" 对象分配给主菜单变量
- 将 "CreditsMenu" 对象分配给 Credits Menu 变量
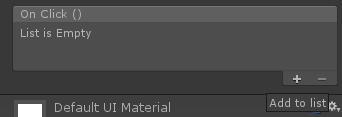
最后一步是将 SC_MainMenu 函数绑定到每个按钮。
- 选择按钮并在 "On Click ()" 中单击 (+) 以添加新元素变量:
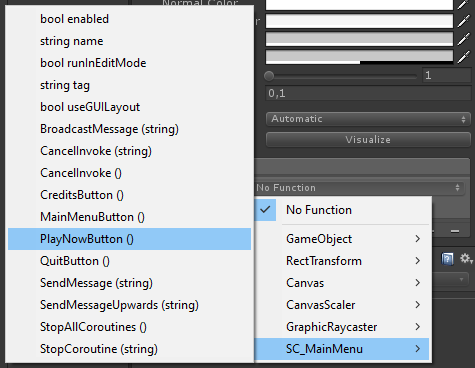
- 将具有 SC_MainMenu 脚本(画布)的对象分配给按钮 "On Click ()" 并选择与该按钮对应的函数(“PlayNowButton()”表示立即播放按钮,"CreditsButton()" 表示积分按钮,"QuitButton()" 表示退出按钮, "MainMenuButton()" 到制作人员菜单中的后退按钮)。

主菜单现已准备就绪。
注意:SC_MainMenu.cs 中的 PlayNowButton() 函数将尝试加载名为 "GameLevel" 的场景。因此,请确保您有一个名为 "GameLevel" 的场景,该场景也已添加到“构建”设置中(或者您可以更改该行中的名称以对应于您要加载的场景的名称)。
有兴趣了解有关 UI 创建的更多信息吗?查看我们关于 How to Make Mobile Touch Controls in Unity 的教程。