使用 PUN 2 通过网络同步刚体
同步 PUN 2 中的对象很简单,但是同步 Rigidbody 怎么样?
与常规游戏对象不同,Rigidbody 也受到重力(如果不是运动学)和其他对象的影响。因此,我们不仅需要同步对象的 Transform,还需要同步几个附加参数,例如 velocity 和 angularVelocity。
在这篇文章中,我将展示如何制作可以受到房间中每个玩家影响并通过网络同步的交互式刚体。
Unity 本教程使用的版本:Unity 2018.3.0f2(64位)
第 1 部分:设置 PUN 2 和多人游戏示例
我们已经有一个关于如何使用 PUN 2 设置多人游戏示例的教程,请查看下面的链接:
设置完多人游戏项目后请回来,以便我们继续。
或者,您可以通过从 here 获取源项目来节省时间。
第 2 部分:添加交互式刚体
如果您按照上面的教程进行操作,您现在将拥有 2 个场景 "GameLobby" 和 "GameLevel"
- 打开 "GameLevel" 场景并创建几个立方体(游戏对象 -> 3D 对象 -> 立方体)
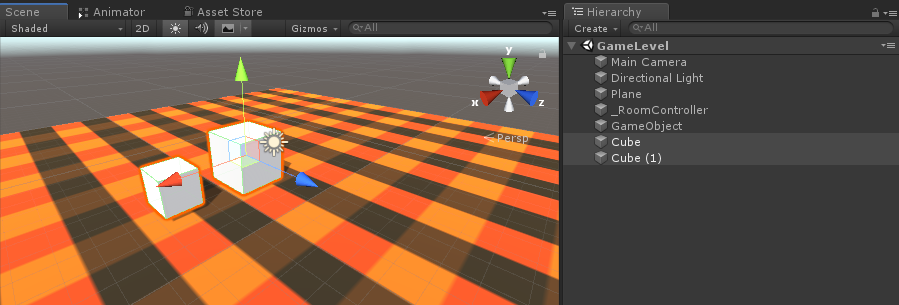
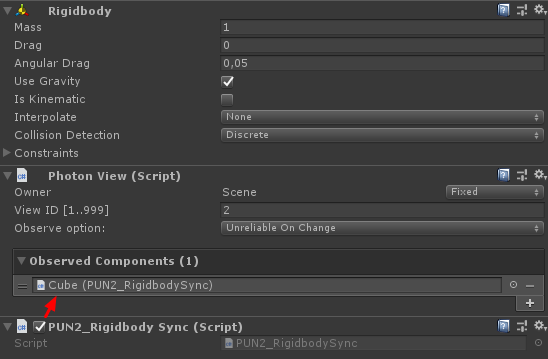
- 为每个立方体添加 一个 Rigidbody 组件
- 向每个 Cube 添加一个 PhotonView 组件
现在我们需要创建一个新脚本来通过网络同步刚体。
- 创建一个新脚本并将其命名为 PUN2_RigidbodySync
PUN2_RigidbodySync.cs
using UnityEngine;
using Photon.Pun;

public class PUN2_RigidbodySync : MonoBehaviourPun, IPunObservable
{

    Rigidbody r;

    Vector3 latestPos;
    Quaternion latestRot;
    Vector3 velocity;
    Vector3 angularVelocity;

    bool valuesReceived = false;

    // Start is called before the first frame update
    void Start()
    {
        r = GetComponent<Rigidbody>();
    }

    public void OnPhotonSerializeView(PhotonStream stream, PhotonMessageInfo info)
    {
        if (stream.IsWriting)
        {
            //We own this player: send the others our data
            stream.SendNext(transform.position);
            stream.SendNext(transform.rotation);
            stream.SendNext(r.velocity);
            stream.SendNext(r.angularVelocity);
        }
        else
        {
            //Network player, receive data
            latestPos = (Vector3)stream.ReceiveNext();
            latestRot = (Quaternion)stream.ReceiveNext();
            velocity = (Vector3)stream.ReceiveNext();
            angularVelocity = (Vector3)stream.ReceiveNext();

            valuesReceived = true;
        }
    }

    // Update is called once per frame
    void Update()
    {
        if (!photonView.IsMine && valuesReceived)
        {
            //Update Object position and Rigidbody parameters
            transform.position = Vector3.Lerp(transform.position, latestPos, Time.deltaTime * 5);
            transform.rotation = Quaternion.Lerp(transform.rotation, latestRot, Time.deltaTime * 5);
            r.velocity = velocity;
            r.angularVelocity = angularVelocity;
        }
    }

    void OnCollisionEnter(Collision contact)
    {
        if (!photonView.IsMine)
        {
            Transform collisionObjectRoot = contact.transform.root;
            if (collisionObjectRoot.CompareTag("Player"))
            {
                //Transfer PhotonView of Rigidbody to our local player
                photonView.TransferOwnership(PhotonNetwork.LocalPlayer);
            }
        }
    }
}- 将 PUN2_RigidbodySync 附加到两个立方体并将其分配给光子视图 "Observed Components":
我们还需要对多人游戏教程中的 PUN2_PlayerSync 脚本进行一些更改:
- 打开 PUN2_PlayerSync.cs
- 在 void Start() 中的 if(photonView.IsMine) 中添加以下代码:
            //Player is local
            gameObject.tag = "Player";
            //Add Rigidbody to make the player interact with rigidbody
            Rigidbody r = gameObject.AddComponent<Rigidbody>();
            r.isKinematic = true;
所以现在 void Start() 应该如下所示:
    // Use this for initialization
    void Start()
    {
        if (photonView.IsMine)
        {
            //Player is local
            gameObject.tag = "Player";
            //Add Rigidbody to make the player interact with rigidbody
            Rigidbody r = gameObject.AddComponent<Rigidbody>();
            r.isKinematic = true;
        }
        else
        {
            //Player is Remote, deactivate the scripts and object that should only be enabled for the local player
            for (int i = 0; i < localScripts.Length; i++)
            {
                localScripts[i].enabled = false;
            }
            for (int i = 0; i < localObjects.Length; i++)
            {
                localObjects[i].SetActive(false);
            }
        }
    }
通过添加 Rigidbody 组件,我们确保玩家实例可以与其他 Rigidbody 交互,并且通过将标签更改为 "Player",我们可以检测它是否是与 Rigidbody 碰撞的本地实例。
- 一切完成后保存游戏关卡场景。
现在让我们构建并测试它!
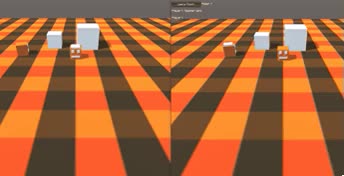
一切都按预期进行,现在刚体可以通过网络同步,同时仍然可以交互。