Unity 3D 蠕虫控制器教程
在本教程中,我将展示如何在 Unity 中创建一个简单的蠕虫控制器,灵感来自 TornadoTwins 初学者游戏开发教程系列。
蠕虫控制器将以平滑的尾部跟随效果滑行,并具有跳跃能力。
本教程中的脚本最初是用 JavaScript(又名 UnityScript)编写的,现在不再受支持,因此我将提供 C# 替代方案。
要在 Unity 中创建蠕虫控制器,我们需要:
- 创建必要的脚本
- 创建蠕虫角色
- 将脚本分配给角色
第 1 步:创建所有必要的脚本
让我们首先创建设置蠕虫控制器所需的所有脚本:
- 创建 一个新脚本,将其命名为 "SC_WormController" 并将以下代码粘贴到其中:
SC_WormController.cs
using System.Collections;
using System.Collections.Generic;
using UnityEngine;

[RequireComponent(typeof(CharacterController))]
public class SC_WormController : MonoBehaviour
{
    public float speed = 3.0f;
    public float rotateSpeed = 1.0f;
    public float jumpSpeed = 5.0f;
    public float gravity = 9.8f;

    CharacterController controller;
    Vector3 moveDirection;

    // Start is called before the first frame update
    void Start()
    {
        controller = GetComponent<CharacterController>();
    }

    // Update is called once per frame
    void Update()
    {
        // Rotate around y - axis
        transform.Rotate(0, Input.GetAxis("Horizontal") * rotateSpeed, 0);

        // Move forward / backward
        Vector3 forward = transform.TransformDirection(Vector3.forward);
        float curSpeed = speed * Input.GetAxis("Vertical");
        float movementDirectionY = moveDirection.y;
        moveDirection = forward * curSpeed;

        // Jumping
        if (Input.GetButtonDown("Jump") && controller.isGrounded)
        {
            moveDirection.y = jumpSpeed;
        }
        else
        {
            moveDirection.y = movementDirectionY;
        }

        // Apply gravity. Gravity is multiplied by deltaTime twice (once here, and once below
        // when the moveDirection is multiplied by deltaTime). This is because gravity should be applied
        // as an acceleration (ms^-2)
        if (!controller.isGrounded)
        {
            moveDirection.y -= gravity * Time.deltaTime;
        }

        // Move the controller
        controller.Move(moveDirection * Time.deltaTime);
    }
}- 创建一个新脚本,将其命名为 "SC_CameraFollow" 并将以下代码粘贴到其中:
SC_CameraFollow.cs
using System.Collections;
using System.Collections.Generic;
using UnityEngine;

public class SC_CameraFollow : MonoBehaviour
{
    /*
    This camera smoothers out rotation around the y-axis and height.
    Horizontal Distance to the target is always fixed.

    There are many different ways to smooth the rotation but doing it this way gives you a lot of control over how the camera behaves.

    For every of those smoothed values we calculate the wanted value and the current value.
    Then we smooth it using the Lerp function.
    Then we apply the smoothed values to the transform's position.
    */

    // The target we are following
    public Transform target;
    // The distance in the x-z plane to the target
    public float distance = 10.0f;
    // the height we want the camera to be above the target
    public float height = 5.0f;
    // How much we
    public float heightDamping = 2.0f;
    public float rotationDamping = 3.0f;

    void LateUpdate()
    {
        // Early out if we don't have a target
        if (!target)
            return;

        // Calculate the current rotation angles
        float wantedRotationAngle = target.eulerAngles.y;
        float wantedHeight = target.position.y + height;
        float currentRotationAngle = transform.eulerAngles.y;
        float currentHeight = transform.position.y;

        // Damp the rotation around the y-axis
        currentRotationAngle = Mathf.LerpAngle(currentRotationAngle, wantedRotationAngle, rotationDamping * Time.deltaTime);

        // Damp the height
        currentHeight = Mathf.Lerp(currentHeight, wantedHeight, heightDamping * Time.deltaTime);

        // Convert the angle into a rotation
        Quaternion currentRotation = Quaternion.Euler(0, currentRotationAngle, 0);

        // Set the position of the camera on the x-z plane to:
        // distance meters behind the target
        transform.position = target.position;
        transform.position -= currentRotation * Vector3.forward * distance;

        // Set the height of the camera
        transform.position = new Vector3(transform.position.x, currentHeight, transform.position.z);

        // Always look at the target
        transform.LookAt(target);
    }
}- 创建 一个新脚本,将其命名为 "SC_SmoothFollow" 并将以下代码粘贴到其中:
SC_SmoothFollow.cs
using System.Collections;
using System.Collections.Generic;
using UnityEngine;

public class SC_SmoothFollow : MonoBehaviour
{
    // The target we are following
    public Transform target;
    // The distance in the x-z plane to the target
    public float distance = 10.0f;
    // the height we want the camera to be above the target
    public float height = 5.0f;
    // How much we
    public float heightDamping = 2.0f;
    public float rotationDamping = 3.0f;

    // Start is called before the first frame update
    void Start()
    {
        if (!target) return;

        transform.LookAt(target);
    }

    void LateUpdate()
    {
        // Early out if we don't have a target
        if (!target) return;

        // Calculate the current rotation angles
        float wantedRotationAngle = target.eulerAngles.y;
        float wantedHeight = target.position.y + height;

        float currentRotationAngle = transform.eulerAngles.y;
        float currentHeight = transform.position.y;

        // Damp the rotation around the y-axis
        currentRotationAngle = Mathf.LerpAngle(currentRotationAngle, wantedRotationAngle, rotationDamping * Time.deltaTime);

        // Damp the height
        currentHeight = Mathf.Lerp(currentHeight, wantedHeight, heightDamping * Time.deltaTime);

        // Convert the angle into a rotation
        var currentRotation = Quaternion.Euler(0, currentRotationAngle, 0);

        // Set the position of the camera on the x-z plane to:
        // distance meters behind the target
        transform.position = target.position;
        transform.position -= currentRotation * Vector3.forward * distance;

        // Set the height of the camera
        transform.position = new Vector3(transform.position.x, currentHeight, transform.position.z);

        // Always look at the target
        transform.LookAt(target);
    }
}
第2步:创建蠕虫角色
下一步是创建蠕虫角色:
- 创建一个新的 Sphere(GameObject -> 3D Object -> Sphere),将其位置更改为 (0, 0, 0),删除其 SphereCollider 组件,并将其重命名为 "Worm"

- 复制 "Worm" 球体,将其重命名为 "BodyPart1",将其位置更改为 (0, -0.1, -0.9),并将其比例更改为 (0.8, 0.8, 0.8)
- 再次复制 "Worm" 球体,将其重命名为 "BodyPart2",将其位置更改为 (0, -0.2, -1.6),并将其比例更改为 (0.6, 0.6, 0.6)

- 右键单击 "Worm" 对象 -> Create Empty 并将新创建的对象重命名为 "Eyes"
- 复制 "BodyPart2" 球体,将其重命名为 "Eye" 并将其移动到 "Eyes" 对象内,将其位置更改为 (-0.24, 0.353, 0.324) 并将其比例更改为 (0.4, 0.4, 0.4)
- 复制 "Eye" 球体并将其 X 位置更改为 0.24

- 为了实现可视化,您可以创建一些材质,例如,身体为绿色,眼睛为蓝色。

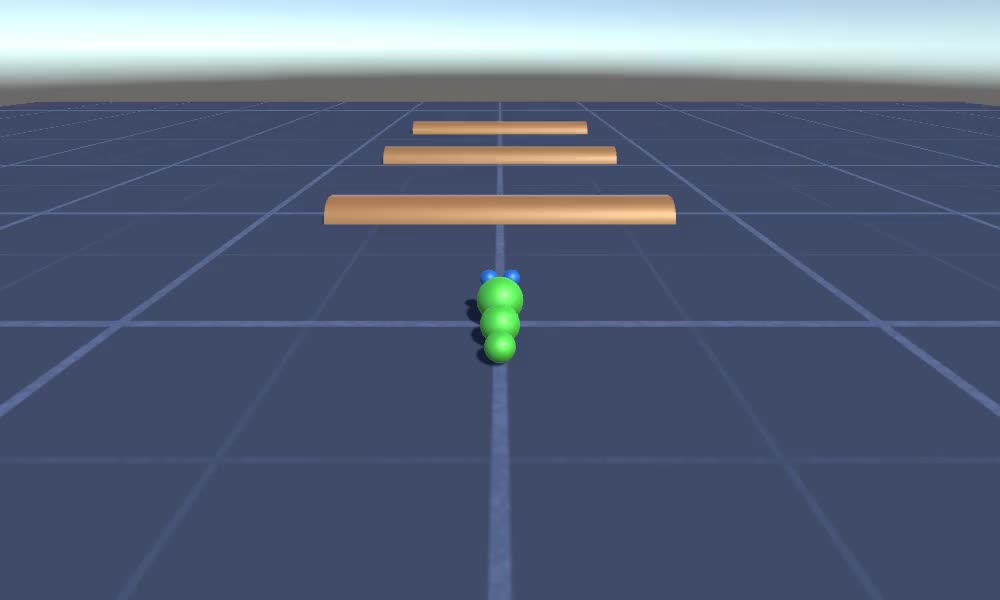
蠕虫角色已准备就绪。
第三步:设置蠕虫控制器
最后一步是分配脚本:
- 将 SC_CameraFollow 脚本附加到主摄像机对象并将 "Worm" 球体分配给目标变量:

- 将 SC_WormController 脚本附加到"Worm" 球体(它将自动添加另一个名为CharacterController 的组件):

- 将 SC_SmoothFollow 脚本附加到 "BodyPart1" 球体,并将其值设置为与下面的 screenshot 中相同:

- 将 SC_SmoothFollow 脚本附加到 "BodyPart2" 球体,并将其值设置为与下面的 screenshot 中相同:

控制器现已准备就绪,使用 W、A、S、D 四处移动,使用 Space 跳跃。
源 Unity 包可在下面找到。