Unity 自顶向下播放器控制器教程
许多人都熟悉 FPS(第一人称射击游戏)和 RTS(即时战略游戏)等游戏类型,但也有许多游戏不只属于某一特定类别。其中一款游戏是自上而下的射击游戏。
Top-Down Shooter 是一款从俯视角度控制玩家的游戏。
自上而下的射击游戏的例子有《迈阿密热线》、《迈阿密热线 2》、《原创侠盗猎车手》等。

要在 Unity 中制作自上而下的角色控制器,请按照以下步骤操作。
第 1 步:创建脚本
对于本教程,我们只需要一个脚本。
- 创建 一个新脚本,将其命名为 SC_TopDownController,删除其中的所有内容,然后将以下代码粘贴到其中:
SC_TopDownController.cs
using UnityEngine;

[RequireComponent(typeof(Rigidbody))]
[RequireComponent(typeof(CapsuleCollider))]

public class SC_TopDownController : MonoBehaviour
{
    //Player Camera variables
    public enum CameraDirection { x, z }
    public CameraDirection cameraDirection = CameraDirection.x;
    public float cameraHeight = 20f;
    public float cameraDistance = 7f;
    public Camera playerCamera;
    public GameObject targetIndicatorPrefab;
    //Player Controller variables
    public float speed = 5.0f;
    public float gravity = 14.0f;
    public float maxVelocityChange = 10.0f;
    public bool canJump = true;
    public float jumpHeight = 2.0f;
    //Private variables
    bool grounded = false;
    Rigidbody r;
    GameObject targetObject;
    //Mouse cursor Camera offset effect
    Vector2 playerPosOnScreen;
    Vector2 cursorPosition;
    Vector2 offsetVector;
    //Plane that represents imaginary floor that will be used to calculate Aim target position
    Plane surfacePlane = new Plane();

    void Awake()
    {
        r = GetComponent<Rigidbody>();
        r.freezeRotation = true;
        r.useGravity = false;

        //Instantiate aim target prefab
        if (targetIndicatorPrefab)
        {
            targetObject = Instantiate(targetIndicatorPrefab, Vector3.zero, Quaternion.identity) as GameObject;
        }

        //Hide the cursor
        Cursor.visible = false;
    }

    void FixedUpdate()
    {
        //Setup camera offset
        Vector3 cameraOffset = Vector3.zero;
        if (cameraDirection == CameraDirection.x)
        {
            cameraOffset = new Vector3(cameraDistance, cameraHeight, 0);
        }
        else if (cameraDirection == CameraDirection.z)
        {
            cameraOffset = new Vector3(0, cameraHeight, cameraDistance);
        }

        if (grounded)
        {
            Vector3 targetVelocity = Vector3.zero;
            // Calculate how fast we should be moving
            if (cameraDirection == CameraDirection.x)
            {
                targetVelocity = new Vector3(Input.GetAxis("Vertical") * (cameraDistance >= 0 ? -1 : 1), 0, Input.GetAxis("Horizontal") * (cameraDistance >= 0 ? 1 : -1));
            }
            else if (cameraDirection == CameraDirection.z)
            {
                targetVelocity = new Vector3(Input.GetAxis("Horizontal") * (cameraDistance >= 0 ? -1 : 1), 0, Input.GetAxis("Vertical") * (cameraDistance >= 0 ? -1 : 1));
            }
            targetVelocity *= speed;

            // Apply a force that attempts to reach our target velocity
            Vector3 velocity = r.velocity;
            Vector3 velocityChange = (targetVelocity - velocity);
            velocityChange.x = Mathf.Clamp(velocityChange.x, -maxVelocityChange, maxVelocityChange);
            velocityChange.z = Mathf.Clamp(velocityChange.z, -maxVelocityChange, maxVelocityChange);
            velocityChange.y = 0;
            r.AddForce(velocityChange, ForceMode.VelocityChange);

            // Jump
            if (canJump && Input.GetButton("Jump"))
            {
                r.velocity = new Vector3(velocity.x, CalculateJumpVerticalSpeed(), velocity.z);
            }
        }

        // We apply gravity manually for more tuning control
        r.AddForce(new Vector3(0, -gravity * r.mass, 0));

        grounded = false;

        //Mouse cursor offset effect
        playerPosOnScreen = playerCamera.WorldToViewportPoint(transform.position);
        cursorPosition = playerCamera.ScreenToViewportPoint(Input.mousePosition);
        offsetVector = cursorPosition - playerPosOnScreen;

        //Camera follow
        playerCamera.transform.position = Vector3.Lerp(playerCamera.transform.position, transform.position + cameraOffset, Time.deltaTime * 7.4f);
        playerCamera.transform.LookAt(transform.position + new Vector3(-offsetVector.y * 2, 0, offsetVector.x * 2));

        //Aim target position and rotation
        targetObject.transform.position = GetAimTargetPos();
        targetObject.transform.LookAt(new Vector3(transform.position.x, targetObject.transform.position.y, transform.position.z));

        //Player rotation
        transform.LookAt(new Vector3(targetObject.transform.position.x, transform.position.y, targetObject.transform.position.z));
    }

    Vector3 GetAimTargetPos()
    {
        //Update surface plane
        surfacePlane.SetNormalAndPosition(Vector3.up, transform.position);

        //Create a ray from the Mouse click position
        Ray ray = playerCamera.ScreenPointToRay(Input.mousePosition);

        //Initialise the enter variable
        float enter = 0.0f;

        if (surfacePlane.Raycast(ray, out enter))
        {
            //Get the point that is clicked
            Vector3 hitPoint = ray.GetPoint(enter);

            //Move your cube GameObject to the point where you clicked
            return hitPoint;
        }

        //No raycast hit, hide the aim target by moving it far away
        return new Vector3(-5000, -5000, -5000);
    }

    void OnCollisionStay()
    {
        grounded = true;
    }

    float CalculateJumpVerticalSpeed()
    {
        // From the jump height and gravity we deduce the upwards speed
        // for the character to reach at the apex.
        return Mathf.Sqrt(2 * jumpHeight * gravity);
    }
}![]()
第 2 步:创建着色器
本教程还需要一个自定义着色器,用于使 Aim 目标覆盖其余对象(始终位于顶部)。
- 右键单击项目视图 -> 创建 -> 着色器 -> 标准表面着色器
- 为着色器命名 "Cursor"

- 打开着色器,删除其中的所有内容,然后粘贴以下代码:
光标着色器
Shader "Custom/FX/Cursor" {
	Properties {
		_MainTex ("Base", 2D) = "white" {}
	}

	CGINCLUDE

		#include "UnityCG.cginc"

		sampler2D _MainTex;

		half4 _MainTex_ST;

		struct v2f {
			half4 pos : SV_POSITION;
			half2 uv : TEXCOORD0;
		};

		v2f vert(appdata_full v) {
			v2f o;

			o.pos = UnityObjectToClipPos (v.vertex);
			o.uv.xy = TRANSFORM_TEX(v.texcoord, _MainTex);

			return o;
		}

		fixed4 frag( v2f i ) : COLOR {
			return tex2D (_MainTex, i.uv.xy);
		}

	ENDCG

	SubShader {
		Tags { "RenderType" = "Transparent" "Queue" = "Transparent+100"}
		Cull Off
		Lighting Off
		ZWrite Off
		ZTest Always
		Fog { Mode Off }
		Blend SrcAlpha OneMinusSrcAlpha

	Pass {

		CGPROGRAM

		#pragma vertex vert
		#pragma fragment frag
		#pragma fragmentoption ARB_precision_hint_fastest

		ENDCG

		}

	}
	FallBack Off
}![]()
第 3 步:设置自上而下的角色控制器
让我们设置一个自上而下的角色控制器:
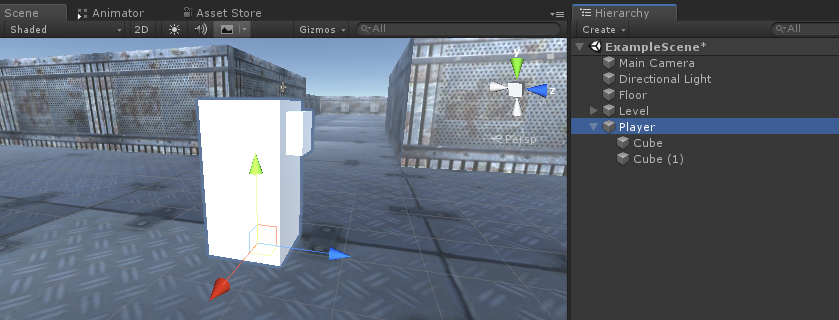
- 创建一个新的 GameObject 并调用它 "Player"
- 创建一个新的立方体并缩放它(在我的例子中,比例是(1,2,1))
- 创建第二个立方体,将其缩放得更小,然后将其移动到上方区域(这只是为了知道玩家正在看哪个方向)
- 将两个立方体移动到 "Player" 对象内并删除它们的 BoxCollider 组件
现在,在继续之前,让我们创建 Aim 目标预制件:
- 创建一个新的 GameObject 并调用它 "AimTarget"
- 创建一个新的四边形(游戏对象 -> 3D 对象 -> 四边形)并将其移动到 "AimTarget" 对象内
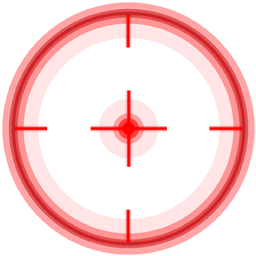
- 将下面的纹理分配给四边形并将材质着色器更改为 'Custom/FX/Cursor'
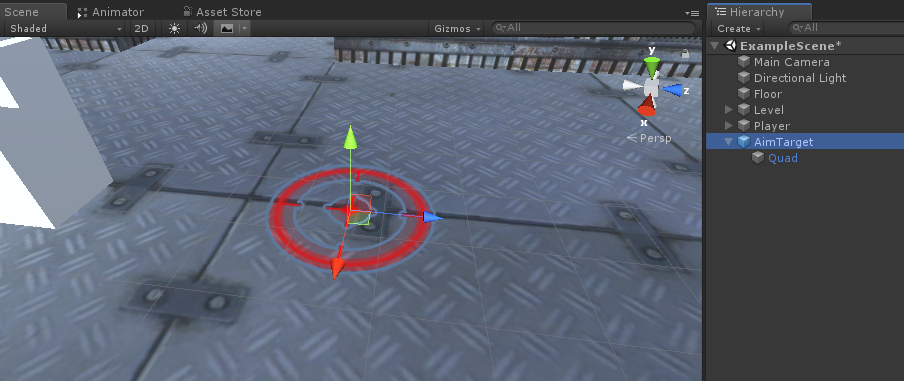
- 将 "AimTarget" 保存到 Prefab 并将其从场景中删除
![]()
回到Player实例:
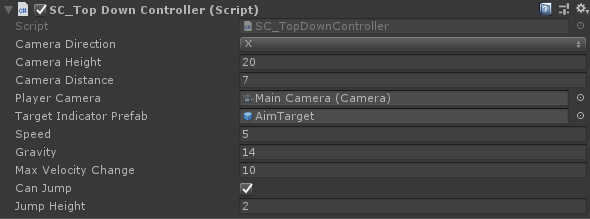
- 将 SC_TopDownController 脚本附加到 "Player" 对象(您会注意到它添加了一些附加组件,例如 Rigidbody 和 CapsuleCollider)
- 缩放 CapsuleCollider 直到它与玩家模型匹配(在我的例子中,高度设置为 2,中心设置为 (0, 1, 0)
- 最后,在 SC_TopDownController 中分配 "Player Camera" 和 "Target Indicator Prefab" 变量
Player 实例现已准备就绪,让我们测试一下:
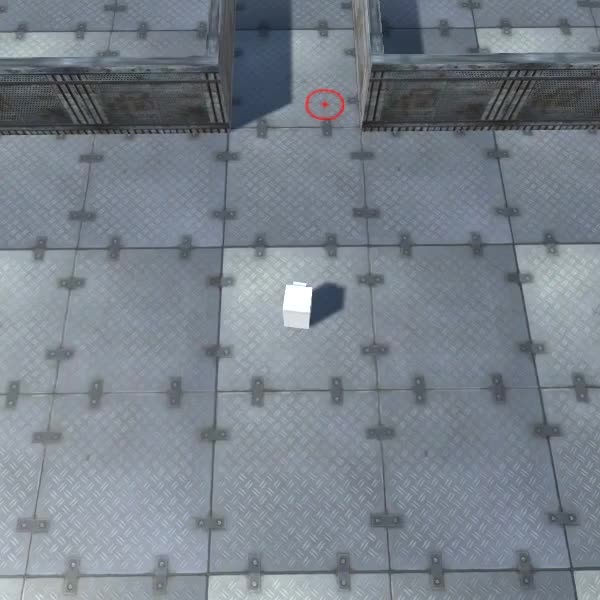
一切都按预期进行。